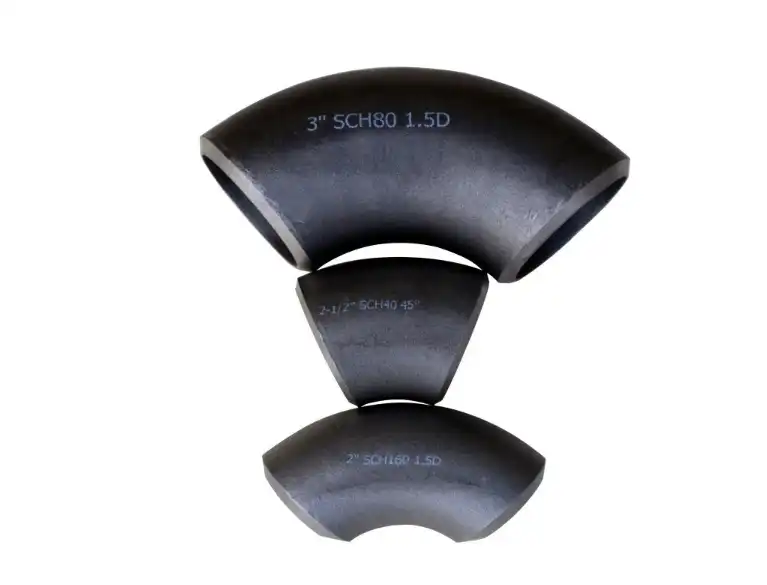
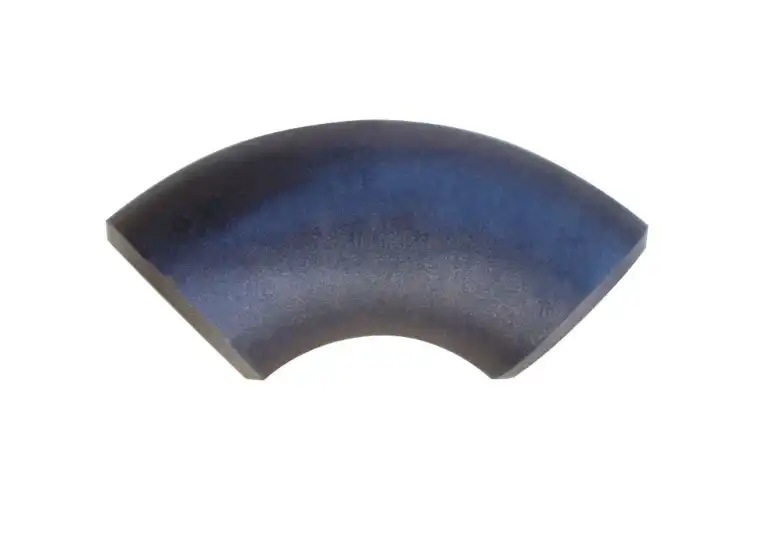
Top 5 Installation Techniques for Butt Weld Elbows
Industrial piping systems rely on elbows to change the direction of a pipeline without creating an unnecessary break in the flow path. Among the available connection types, butt weld elbows are widely used where a permanent welded joint is preferred and where the pipe system must maintain consistent strength and alignment. But their performance relies on much more than the quality of the elbow itself. The quality of the completed connection depends on the preparation of the pipe end, dimensional precision, fit-up, welding technique, and final check.
Thus, the installation of a butt-weld elbow is a process of control and not just a question of putting the fitting against the pipe and performing a weld. Even a good quality elbow will make a bad joint if the pipe ends are dirty, if the parts are not lined up, if the root opening is not uniform, or if the welding method is not followed. A little installation fault might potentially become more important if the pipe system is subjected to pressure, temperature fluctuations, vibration, or repetitive operation cycles.
A uniform installation approach can help minimize rework and facilitate inspection for contractors, fabricators, and maintenance crews. Here are five strategies that concentrate on the portions of the installation process that have the most impact on joint quality, from pipe preparation and fit-up checks to control of the welding process and verification of the completed connection.
How Should Pipe Ends Be Prepared for Butt Weld Elbows?
Start With Clean, Damage-Free Surfaces
Before an elbow is connected to the pipe, the mating surfaces have to be free of dirt and other impurities that might interfere with welding. Oil, moisture, paint residue, corrosion, dirt, and loose metal particles may influence the quality of the weld and the stability of the arc. This is especially true in the root region where access may be restricted during fit-up. You should also inspect the inside of the pipe, as foreign material left in the line might cause difficulties during manufacture or in subsequent operation.
Cleaning should be accomplished by means relevant to the material and the welding technology being used. Abrasive tools could work for removal of surface pollution, but they must not cause deep scratches or change the necessary geometry of the pipe end. Once cleaned, cover the pipe and elbow from further contamination until the junction is ready for welding.
The termination of the pipe must also be in good shape. Any burrs or sharp edges, and any severe oxidation or damaged regions, should be removed without undue reduction in wall thickness. A clean, well-prepared surface offers the welder a more consistent starting point and makes it simpler to get the desired weld profile.
Match the Bevel and End Preparation to the Welding Procedure
The end preparation of the pipe and elbow should be appropriate for the welding process being used. The general guideline should not be to pick the bevel angle, root face, and root opening since the measurements depend on the grade of the material, wall thickness, welding technique, and the needs of the project.
Therefore, a generic size in an installation guide should be replaced by the relevant WPS, fabrication specification, or engineering standard. The end of the pipe should be looked at around its whole circle. If the bevel varies much from side to side, it might make the weld pool difficult to regulate and can cause irregular penetration.
The junction between the pipe and butt weld elbows should be smooth, without unintended notches or uneven grinding marks. Where the preparation is done using a machining or beveling tool, the completed surface should be visually examined prior to fit-up. Good preparation at this point may save a world of trouble later on when the welding has begun.

How Can Fit-Up Accuracy Improve Elbow Installation?
Control Alignment Before Tack Welding
The most crucial aspect of butt-weld elbow installation is proper alignment. The pipe and elbow must be positioned in the direction of the desired pipeline, keeping the bore in alignment. If the parts are pressed together to accommodate dimensional variations, the induced stress might stay in the joint after the welding process is complete.
Before tack welding, the installers should examine the elbow position, pipe centerline, and the quality of the mating ends. Alignment clamps and other fit-up equipment, if applicable, may aid in retaining the position while the connection is made up. The purpose is not only to make the exterior surfaces seem uniform but also the interior alignment and continuity of the bore of the pipe as well.
The root gap should be verified all around the joint, not only measured at one spot. An irregular aperture is going to vary the quantity of filler metal and heat you need throughout the perimeter, making it more difficult to maintain constant penetration. Any major misalignment internally should be addressed prior to welding rather than covered up with more weld metal.
Use Tack Welds to Hold the Joint in Position
After the fit-up is checked, tack welds may be employed to retain the pipe and elbow in the desired position. The quantity, size, and placement of tack welds should be in accordance with the appropriate welding method, especially if the pipe is subject to stringent quality criteria.
Tacks ought to be sound and correctly fused since they form a part of the final weld or are removed per the technique. If not adequately treated, discontinuities like fractures, contaminants, or other defects may be present in the completed joint in the tack welds.
Also, avoid the use of makeshift materials or interim processes that might contaminate the weld region. The original post suggested using Teflon to retain the elbow, which is not a proper general installation procedure. The use of proper alignment clamps, fit-up equipment, and certified tack welding is a more regulated and more suitable technique for industrial fabrication operations.
Which Welding Position Should Be Used for Butt Weld Elbows?
Choose the Position Based on Access and Project Requirements
The welding position is based on the pipe diameter, location of the connection, fabrication, access, and the welding method. The fabricator may, where practicable, arrange the unit to provide the welder a more comfortable working angle. However, in field installations, the location may be dictated by the existing pipeline and adjacent equipment with limited ability to spin the pipe.
You need to manage the weld pool and travel speed in horizontal, vertical, and overhead locations. The purpose is not just to pick the simplest location but to follow the parameters dictated by the certified welding method throughout the whole joint.
If the pipes are arranged to accommodate it, horizontal welding may provide reasonably pleasant access, but the welder must maintain a uniform angle of the electrode or flame and speed of movement. Changes in speed may lead to changes in bead form and heat input, especially in multiple pass joints.
Gravity has its effect on molten metal; hence, vertical welding takes extra management. Depending on the joint design and the operation, the welder may move in a suitable upward or downward direction. The chosen process must be compatible with the qualifying WPS and not only a matter of personal choice.
Welding above sometimes takes considerably more control when working with butt weld elbows since the molten pool is above the welder. A weld pool may be maintained using shorter arc control, suitable travel speed, and careful management. Safe working access is also required, as poor placement may influence both weld quality and welder safety.
How Should Welding Parameters Be Controlled?
Follow the Qualified WPS Rather Than Guessing the Settings
Welding parameters should be selected according to the applicable WPS and the materials being joined. Current, voltage, travel speed, shielding gas, electrode or filler metal, preheat, interpass temperature, and the number of passes may all affect the finished joint.
There is no single current or travel speed that is suitable for every butt weld elbow installation. Pipe diameter and wall thickness can vary significantly, and different materials respond differently to heat. Applying excessive heat may increase distortion or adversely affect the material, while insufficient heat can contribute to incomplete fusion or penetration problems.
For multi-pass welds, interpass conditions should be monitored according to the procedure. Cleaning between passes is also important because slag, oxides, or other contamination left in the joint can become incorporated into subsequent weld layers.
A qualified welder should be able to maintain a consistent travel pattern while responding to changes in joint geometry. This is especially important around an elbow because the orientation of the joint changes continuously as the welder progresses around the circumference.
Manage Distortion During the Welding Sequence
Heat input can cause the pipe and elbow to move as the weld progresses. If distortion is not controlled, the final assembly may no longer match the required pipeline orientation. The effect can be more noticeable with larger components, thinner wall sections, or long unsupported pipe runs.
A suitable welding sequence can help distribute heat around the joint instead of concentrating it in one area. Tack weld placement, clamping, and controlled welding progression may also reduce movement. These measures should be consistent with the project procedure because excessive restraint can introduce its own problems.
Installers should therefore inspect alignment during fabrication rather than waiting until the entire weld is complete. If movement is detected early, it can often be corrected more easily than after the joint has cooled and the assembly has become difficult to reposition.
What Should Be Checked After Installing Butt Weld Elbows?
Perform Visual Inspection Before Further Testing
The completed weld should be cleaned and visually examined before the connection is accepted or covered. The inspection should consider the overall weld appearance as well as visible indications such as cracks, excessive undercut, surface porosity, irregular bead shape, incomplete areas, or other conditions defined as unacceptable by the governing specification.
The elbow should also be checked for its final orientation. A weld can appear satisfactory while the elbow is positioned incorrectly relative to the pipeline. Confirming the assembly against the drawing or installation layout helps prevent a dimensional problem from being discovered only after additional pipe sections or equipment have been connected.
Visual inspection does not replace other required quality checks. Instead, it provides an early opportunity to identify obvious issues before more time and material are invested in the completed system.
Apply Non-Destructive Testing When Required
Depending on the service, material, pipe class, project specification, or applicable code, additional non-destructive examination may be required for butt weld elbows. Methods can include radiographic testing, ultrasonic testing, liquid penetrant testing, or magnetic particle testing, depending on the material and the type of discontinuity being investigated.
The appropriate examination method and acceptance criteria should come from the applicable code, specification, inspection plan, or project documentation. It would be misleading to suggest that every elbow requires the same level of testing because inspection requirements can vary considerably between applications.
Post-weld heat treatment may also apply to certain materials, thicknesses, or service conditions. When PWHT is specified, it should be performed and documented according to the applicable procedure rather than treated as a routine step for every installation.
What Common Problems Can Affect Butt Weld Elbow Installation?
Avoid Forcing Components into Alignment
One common fabrication problem occurs when an elbow is forced into position because the pipe end or surrounding pipework does not align naturally. While clamps can help hold correctly prepared components together, they should not be used to compensate for major dimensional errors.
The better approach is to identify the source of the misalignment before welding. The pipe may need to be repositioned, cut, or prepared again so that the elbow can be fitted without excessive external force. This approach takes more care at the beginning but can prevent stress and rework later.
Do Not Compensate for Poor Preparation with Extra Weld Metal
Another problem is attempting to correct an incorrect root opening, damaged bevel, or poor fit-up by adding more filler metal. Welding should not be used as a substitute for proper dimensional preparation.
If the joint geometry is outside the permitted range, it should be corrected according to the applicable procedure before welding continues. This is particularly important for pressure-containing piping, where joint quality needs to be controlled throughout the fabrication process rather than judged only by its final appearance.
Keep Installation Records Where Traceability Is Required
For controlled industrial projects, documentation can be as important as the physical installation. Material identification, welding procedure records, welder qualification, inspection results, and relevant test reports may need to be maintained according to the project quality plan.
Traceability becomes particularly valuable when multiple pipe sizes, material grades, or batches of fittings are being installed in the same project. Clear records make it easier to verify that the installed butt weld elbows correspond to the approved material and fabrication requirements.
How Can Contractors Improve Installation Consistency?
Consistent installation begins before the welder strikes the first arc. The elbow should match the required pipe size, wall thickness, material specification, end preparation, and design orientation. The pipe should then be cleaned, measured, aligned, and inspected before tack welding begins.
Once the fit-up is accepted, welding should follow the qualified WPS and be performed by personnel with the required qualifications. Heat input, travel speed, filler material, interpass conditions, and welding progression should remain within the specified limits. When several welders or crews are working on the same project, using the same approved procedures becomes particularly important because it reduces unnecessary variation between joints.
Inspection should be treated as part of the installation process rather than an activity performed only after a problem is suspected. Checking the fit-up before welding, monitoring the joint during welding, and inspecting the completed weld creates several opportunities to identify problems early.
The quality of the elbow itself also matters. A properly manufactured fitting with consistent dimensions and suitable end preparation is easier to fit and weld than a component with dimensional variation or damaged ends. For buyers, confirming material documentation, dimensional requirements, surface condition, and applicable quality records before installation can therefore reduce problems at the fabrication stage.
Conclusion
Installing butt weld elbows correctly requires more than producing a visible weld around the connection. The quality of the finished joint depends on preparation, dimensional control, alignment, welding practice, and inspection working together as one process. Clean pipe ends and accurate bevel preparation provide the right starting point, while careful fit-up prevents unnecessary stress and alignment problems.
Welding should then be performed according to the applicable WPS, with the position, heat input, travel speed, and welding sequence controlled throughout the joint. After welding, visual inspection and any required non-destructive examination provide additional confirmation that the connection meets the project's acceptance requirements.
For industrial piping contractors and procurement teams, installation quality also begins with selecting fittings that match the project's material, dimensional, and documentation requirements. When the right elbow is combined with disciplined preparation, qualified welding, and appropriate inspection, the resulting connection is more consistent and easier to verify throughout its service life.
Engineers and builders can make better pipe links, including those using butt weld elbows, that can handle tough work conditions by using tried-and-true building methods and keeping a close eye on quality while welding. A careful way of installing pipes not only makes things safer, but it also makes them work better and more reliably. Please contact us at oudi-04@oudiguandao.com if you want to learn more about our collection of pipe parts, such as butt weld elbows. Our team of experts is ready to assist you in picking out the correct items for your requirements and teach you how to use them.
References
1. Smith, J. (2020). Advanced Welding Techniques for Piping Systems. Journal of Welding Technology, 45(3), 178-195.
2. Johnson, R., & Williams, T. (2019). Best Practices in Butt Weld Elbow Installation. Industrial Piping Quarterly, 22(4), 89-102.
3. Brown, M. (2021). Common Errors in Pipe Fitting and How to Avoid Them. Pipelines International, 17(2), 55-68.
4. Davis, A., & Thompson, L. (2018). The Impact of Proper Pipe End Preparation on Weld Quality. Welding Engineering Review, 31(1), 12-25.
5. Wilson, K. (2022). Optimizing Welding Positions for Butt Weld Elbows. Journal of Piping Systems and Engineering, 39(5), 210-224.
6. Lee, S., & Parker, G. (2020). Post-Weld Heat Treatment: Essential Considerations for Piping Systems. Materials Science and Engineering Quarterly, 28(3), 145-159.

Need help finding the right solution with our experts. Please contact us.
SINCE 1998 Your Reliable Pipeline Manufacturer